 There was a time in the not-too-distant past that I was afraid of video. I have some very good friends who made it look so easy (I’m looking at you, Brian Copeland and Dale Chumbley), and I thought I would rather refrain from doing video altogether than put out videos that couldn’t match up to theirs in quality and scope. Plus, to be honest, I had no idea what I was doing.
And then I got an iPhone4.
If you do not have an iPhone 4 (or 4S) and do not plan on getting one, then I apologize – this article is not for you. Though I own a Flip Camera and a Kodak zi8, they’ve never made it out of their boxes. With my iPhone4, I broke out of my shell and started creating videos.
If you do have an iPhone4 or 4S or are getting one soon, then let’s get you started on your path to YouTube stardom…or at least on the path of no longer being afraid of creating video.
Getting comfortable with your iPhone as video camera. Open up the camera on your iPhone and switch it to video mode. Then change the view so that you can see yourself on the screen (this may take a little getting used to!) – this will help you tremendously with lining up your shot and making sure you’re in the frame. (Also, I love that I can shoot videos when I’m alone – it takes away a lot of the stage fright, not having anyone else around!)
Seeing yourself in the screen will also help you to judge the quality of the lighting – if it doesn’t look good to you in the shot, it won’t magically look an better later to a viewer. Try different angles to get the right light for each shot.
Play with the phone inside and outside – learn how changing the angle ever so slightly can result in a better shot: more flattering lighting, making you and what you’re shooting look better.
Scripts and storyboards. While I usually shoot my videos straight off the top of my head and make it up as I go along, this probably won’t work for everyone. If you’re a visual person, you may want to write out a brief script or sketch out a short storyboard before shooting your video. If you’re an auditory person, repeating what you want to say a few times before the camera is on might help. It’s as simple as finding a process that works for you – you may want to make bullet points of the main topics you want to touch on, or perhaps write out what you want to say and post it to a wall or whiteboard opposite from where you are shooting.
You may also want to shoot a couple of practice shots to get comfortable with knowing the camera is rolling and seeing that red light on – and also to get used to seeing your reflection in the camera! Who knows? One of those practice shots may end up being a keeper! Don’t be afraid to mess up – you can always stop the camera and start over. Refrain from deleting every “bad” shot, though – you may be able to salvage some of what you liked from each shot in the editing process.
Short segments. Plan your video in short segments. For me, when I am shooting for a local Atlanta venue or event, I have a formula in mind:
- I start with an introduction, and it always starts the same way: My logo fades into a title screen and then into an opening shot of me introducing the clip: “Hey there, this is Maura Neill with 365Atlanta.com and today I’m…”
- Most of the body of the video is footage of the event – whether in still photos or in video – with me narrating in the form of a voiceover. I edit together a collection of still photos and short videos to create the main section of the video.
- The conclusion of my videos is also consistent: I briefly wrap up what the video has highlighted and then I say, “And of course, for great things to do all around the Atlanta area, visit 365Atlanta.com. See you there!”
Consistency is not only helpful to you, for planning purposes, but also to your viewer: setting up each video with a consistent beginning and ending can help to brand your videos, so that the viewer always knows it’s you and always knows what to expect, especially if you’re shooting a series of related videos.
Shoot in short segments that you can edit together later. For example, if you’re shooting a video about 5 tips to help you sell your home, shoot each tip as a separate segment, perhaps using a different backdrop or location for each one, and then edit them together to create a final product. Or if you’re making a video about an event or an exhibit in your town, shoot eight to ten short segments (under 20 seconds each) of specific parts of the event, include short interviews with the hosts or other spectators, footage of what an attendee will see themselves when they go, etc.
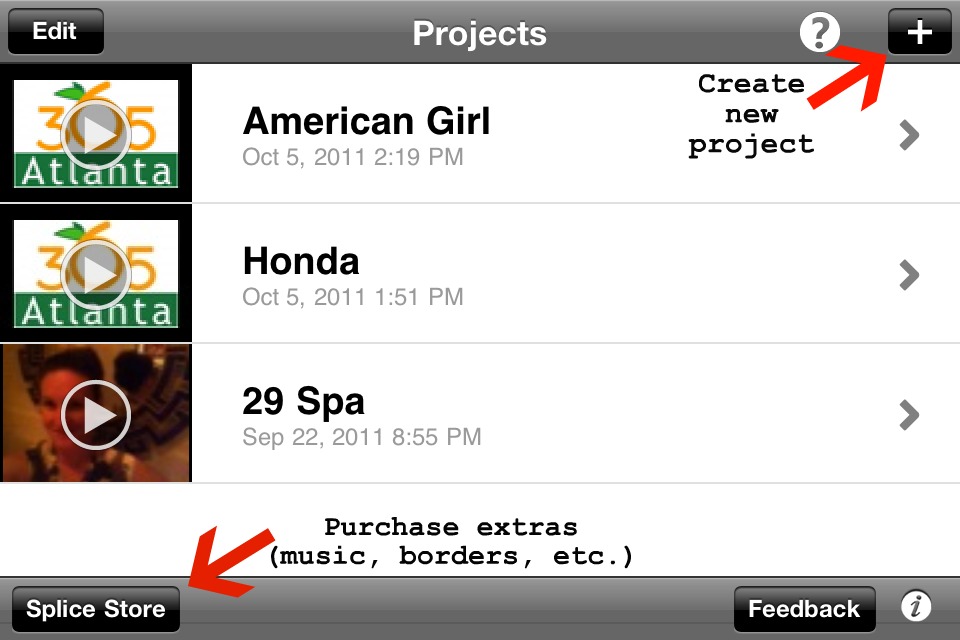
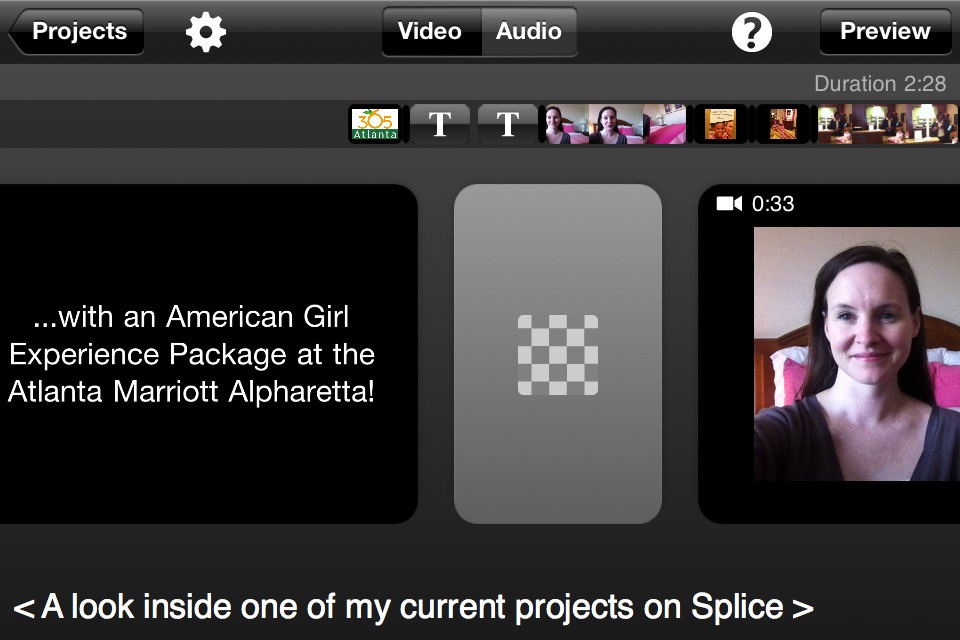
Editing your video. Go to the app store and download Splice (Brian Copeland introduced me to this app and it truly changed my outlook on video). It’s a very simple video editing software, and it’s FREE (there’s also a version that is currently $3.99, but the only difference is that the free version has small ads at the bottom which, while annoying, do not affect your videos in any way). Splice is a fairly intuitive app, by which I mean it’s pretty easy to figure out the basic functionality. I learn something new every time I use it. See the photos on this post for a few quick tips. If you’re not a person who is comfortable with learning as you go, here’s a link to an excellent tutorial video on YouTube (after all, there’s no need for me to recreate the wheel!).
How to use Splice App Tutorial Video
My video screen.
Start a project screen.
A dashboard of of my project screen.
The Storyboard screen.
Toggle from video to audio screen.
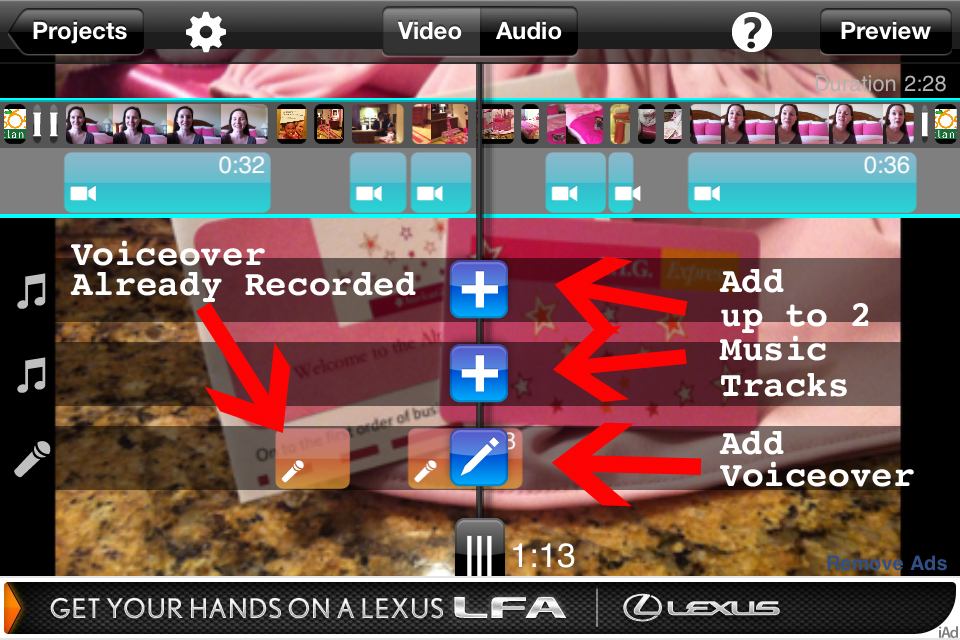
Record a voiceover and add music screen.
A library of music and film trailer music screen.
While not as fancy as iMovie or some other video editing software, Splice is simple and clean and can create a great product, especially for beginners who may be intimidated by fancier applications. Import video clips and photos directly from your phone’s library, add transitions between clips, add title pages and titles as transitions, add music and sound effects, as well as the ability to zoom in and out and pan left and right in video clips and photos. Every time I create a new video, I discover something new I can do with Splice, and though I have ventured into using iMovie on occasion, I’ve found that Splice really has everything I need for the majority of my projects.
Short and sweet. Keep your final, finished product under 3 minutes. Keep this in mind: according to SparkLogix.com, “the average attention span is about 8 to 10 seconds. In that short time your website has to grab the attention of the visitor and if you succeed, you probably have another 2 to 3 minutes to present the relevant information to the visitor.” Don’t lose your viewers by being too long-winded. If you find that you have so much to say or cover that it pushes your video beyond the 3 minute mark, consider splitting up the content into multiple videos, creating a series all about the same topic.
Polishing with audio. If you find that you want to add a little extra something to your videos, like voiceover, an audio track or sound effects, you can easily toggle between the video/photo editing screen and audio editing. Here you can record voiceover tracks straight through the microphone in your iPhone or you can add music, either purchased via Splice or from your iTunes.
Beware, of course, of using commercial music in your videos – if you do not have the rights to the music, you can get into a lot of trouble, so stick to royalty-free music and follow the rules. Ignorance will not hold up in court as a good excuse for using someone else’s copyrighted music, and asking for forgiveness instead of permission, in this case, will not be acceptable. You can purchase a variety of music tracks – from hip hop to orchestral, pop to rock – directly from Splice, as well as a multitude of sound effects. You can also search “royalty free music” in iTunes and come up with more choices than you really want to listen to. You’ll definitely find exactly what you’re looking for (as long as what you’re looking for is not the latest by Taylor Swift!).
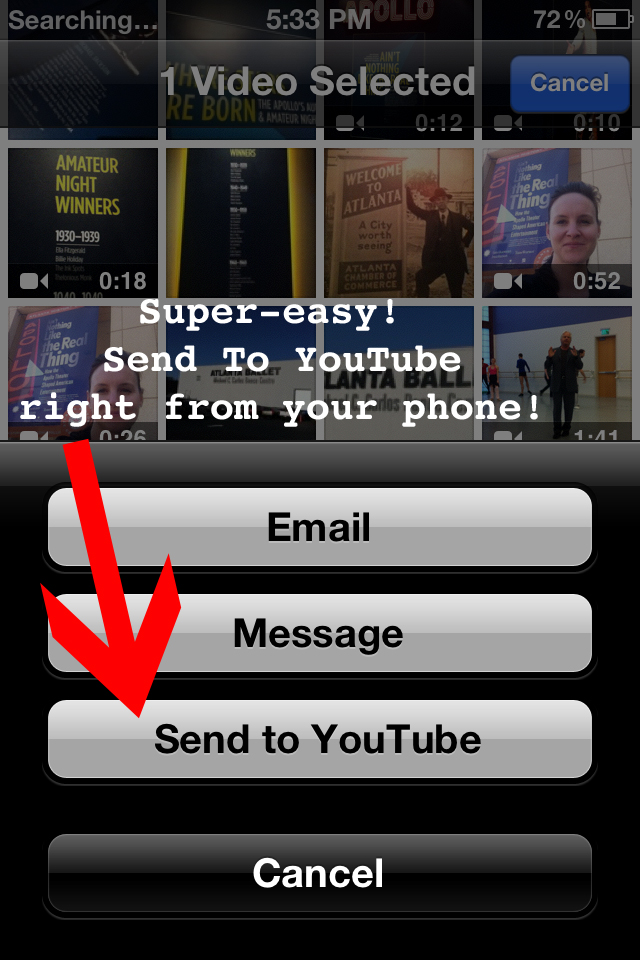
Finishing up. Once you’ve finished creating and editing your video, you will Export it (from the Preview screen). This will deliver the final finished video from your Splice application into your Photos folder. From here, you can upload it directly to YouTube, by clicking on the Share button and choosing the Send to YouTube option.
Just be sure you already have a YouTube account and have it set up on your YouTube application. Follow the upload instructions to enter the basic information, such as the video title, at least one tag, and other basic information; I recommend filling in the minimum information from your iPhone and then logging into YouTube from your laptop or desktop to provide more detail.
Now all that’s left to do is for you to create that first video, and I want to see it! Don’t give it too much thought – do it now before you over think it and get intimidated again!
Here’s your assignment: create a brief video introducing yourself to the world within the next 24 hours. Post it to YouTube and then send out a tweet about it. Just be sure to tag me (@MauraNeill) so I can see your first masterpiece! Good luck!


